Arduino Full Stack Tutorial
Deploying a React app on the ESP32
In this tutorial we are going to build a JavaScript single page app to blink a led.
The tutorial is targeted towards the ESP32 chip but a board with the ESP8266 will work as well. In fact any Arduino compatible board will do as long as it has the required program space. For example, you can use the Arduino Mega together with the Ethernet shield if that is what you have. I will describe the required changes for the different boards.
Of course in real life blinking a led definitely does not require a full blown front-end framework. However, the same workflow can be applied to a lot more complex use cases like this. Also the tutorial is more about the toolchain than it is about Arduino or React programming.
The ready project is hosted at Github. If you want to skip the tutorial and just try out the application first you can download the project from there and flash it to your microcontroller. Throughout the instructions I will also include links to the corresponding commits in the version control system. The links will look like this:
The tutorial is divided into 5 parts:
- 1. Development Environment
- 2. Project Setup
- 3. Back-end Development
- 4. Front-end Development
- 5. Building the Project
1. Development Environment
So let’s get started. There are few prerequisites that you need to follow this tutorial. First off you need a microcontroller development board. Because we are using the Arduino framework the same code is easy to port to multiple different platforms.
Most of the development boards come with an on board user configurable led but you may also connect your own. A relay module is another option. We just need something to toggle on and off.
Unless you already have the Arduino and Node.js development environments ready you will need to install:
Make sure your node.js is newer than 8.10.0:
node -v
And that your npm is newer than 5.2:
npm -v2. Project Setup
While the same workflow can be applied to any single page app framework we are going to use React. To get a head start we are going to create the project template with the create-react-app tool.
To generate the application boilerplate run:
npx create-react-app led-blinkPatiently wait while the script downloads half of the internet.
Running the command created us a new project directory called led-blink . Open the project in your favourite code editor. Our initial project structure now looks like this:
led-blink
├── README.md
  ├── node_modules
  ├── package.json
  ├── .gitignore
  ├── public
  │   ├── favicon.ico
  │   ├── index.html
  │   └── manifest.json
  └── src
      ├── App.css
      ├── App.js
      ├── App.test.js
      ├── index.css
      ├── index.js
      ├── logo.svg
      └── serviceWorker.js
While the create-react-app took care of our front-end boilerplate we still have nothing for the back-end that will be running on the microcontroller.
First move into the newly created project directory in the console window by running:
cd led-blink
Next we need to install some more tools to generate the back-end project:
npm install awot-scripts --save-dev
To generate the back-end boilerplate run:
npx awot-create BlinkServer
Or if you are using the Ethernet shield run:
npx awot-create BlinkServer EthernetThe command created us a ready made Arduino webserver project under the directory BlinkServer. Open the project in the Arduino IDE. If you are planning to edit the Arduino code in your own editor instead of the official IDE, you will want to toggle on the Use external editor setting in the Arduino IDE preferences. Otherwise files that are open in the editor will not get updated if they are edited elsewhere.
Now the project structure looks like this:
led-blink
  ├── README.md
  ├── node_modules
  ├── package.json
  ├── .gitignore
  ├── BlinkServer
  │   ├── BlinkServer.ino
  │   ├── StaticFiles.h
  │   ├── aWOT.cpp
  │   └── aWOT.h
  ├── public
  └── src
3. Back-end Development
The HTTP API is going to be simple. We need to implement two HTTP handler functions. One for reading the current state of the led and one for updating it. For simplicity's sake we are going to use just the characters ‘0’ and ‘1’ to describe the state. Also set your wifi credentials to the WIFI_SSID and WIFI_PASSWORD definitions.
- BlinkServer/BlinkServer.ino +16 -0
|
@@ -3,11 +3,25 @@
|
|
|
3
3
|
|
|
4
4
|
#define WIFI_SSID "network"
|
|
5
5
|
#define WIFI_PASSWORD "password"
|
|
6
|
+
#define LED_BUILTIN 2
|
|
6
7
|
|
|
7
8
|
WiFiServer server(80);
|
|
8
9
|
Application app;
|
|
10
|
+
bool ledOn;
|
|
11
|
+
|
|
12
|
+
void readLed(Request &req, Response &res) {
|
|
13
|
+
res.print(ledOn);
|
|
14
|
+
}
|
|
15
|
+
|
|
16
|
+
void updateLed(Request &req, Response &res) {
|
|
17
|
+
ledOn = (req.read() != '0');
|
|
18
|
+
digitalWrite(LED_BUILTIN, ledOn);
|
|
19
|
+
return readLed(req, res);
|
|
20
|
+
}
|
|
9
21
|
|
|
10
22
|
void setup() {
|
|
23
|
+
pinMode(LED_BUILTIN, OUTPUT);
|
|
11
24
|
Serial.begin(115200);
|
|
12
25
|
WiFi.begin(WIFI_SSID, WIFI_PASSWORD);
|
|
13
26
|
|
|
@@ -18,6 +32,8 @@ void setup() {
|
|
|
18
32
|
|
|
19
33
|
Serial.println(WiFi.localIP());
|
|
20
34
|
|
|
35
|
+
app.get("/led", &readLed);
|
|
36
|
+
app.put("/led", &updateLed);
|
|
21
37
|
app.use(staticFiles());
|
|
22
38
|
server.begin();
|
|
23
39
|
}
|
If you are using the ESP8266 chip we need to make one more modification. Renaming one import is all that is needed.
|
@@ -1,4 +1,4 @@
|
|
|
1
|
-
#include <
|
|
1
|
+
#include <ESP8266WiFi.h>
|
|
2
2
|
#include "aWOT.h"
|
|
3
3
|
#include "StaticFiles.h"
|
|
4
4
|
|
|
5
5
|
#define WIFI_SSID "network"
|
Hook up your development board, and verify that you have the the correct target board and serial port selected. Next open the serial console from Tools -> Serial Monitor in Arduino IDE and then upload the sketch to your microcontroller. When the microcontroller boots up and gets a connection it will print the local IP address. Copy it somewhere as we are going to need it later on.
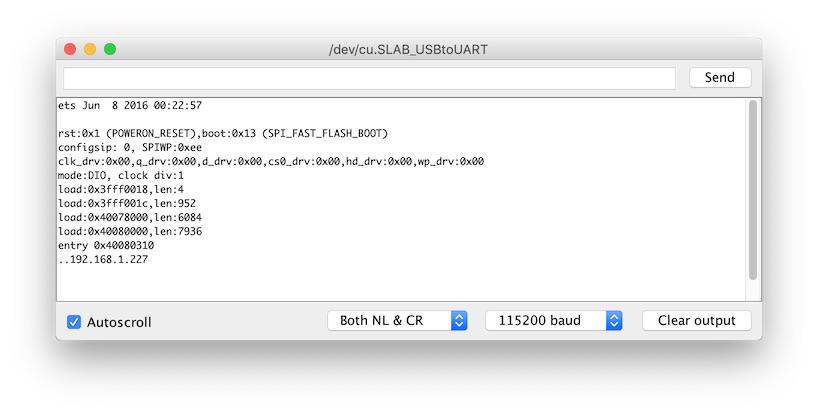
Mine got the IP address 192.168.1.227.
Before moving on let's make sure our back-end works as expected.
To to turn the led off:
curl 'http://192.168.1.227/led' -X PUT --data-binary '0'
To to turn the led on:
curl 'http://192.168.1.227/led' -X PUT --data-binary '1'4. Front-end Development
Now that the back-end is done, we are ready to start working with the user interface. Uploading the user interface files to the microcontroller board every time we make changes would be a way too slow development cycle. Luckily we can proxy all API requests to the microcontroller while we do local development. To forward the API requests to the microcontroller we need to configure the proxy setting in our package.json. Replace the arduino.ip with the address that was printed out in the Serial Monitor.
- package.json +2 -1
|
@@ -25,5 +25,6 @@
|
|
|
25
25
|
],
|
|
26
26
|
"devDependencies": {
|
|
27
27
|
"awot-scripts": "0.0.22"
|
|
28
|
-
}
|
|
28
|
+
},
|
|
29
|
+
"proxy": "http://arduino.ip"
|
|
29
30
|
}
|
Because every cool javascript project uses a lot of libraries to do the most simple things we are going to add a react toggle button component as a project dependency.
npm install react-toggle-button --save
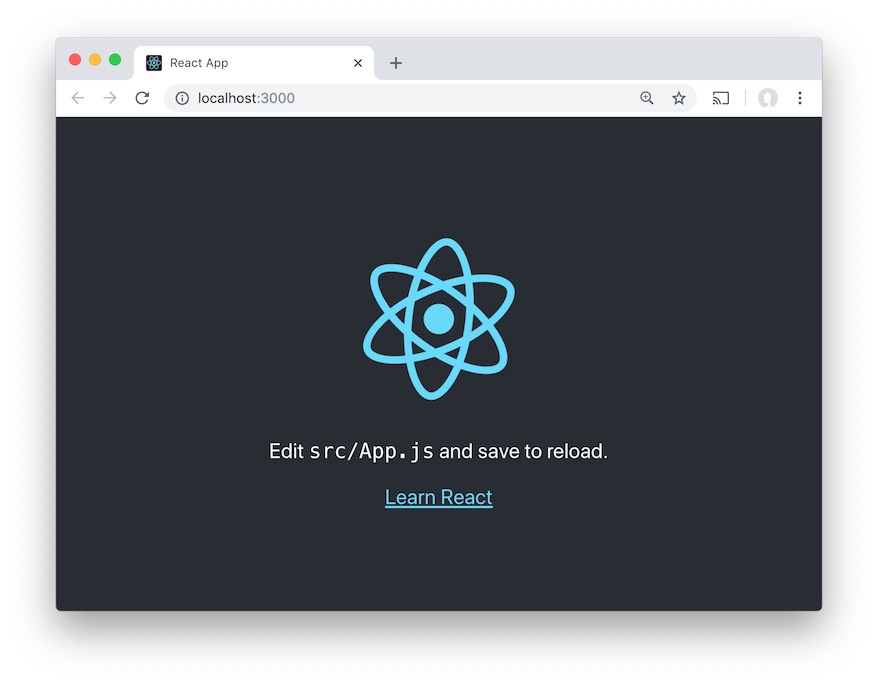
Spin up the development server unless it’s open already:
npm startThe script will take a while to load. Once it is done you should see something like this in your browser:
As instructed, open up the App.js and do the following modifications. .
Update: After writing this tutorial React has introduced function components and this is what the Create React App also uses in the generated code. You can either replace the whole App.js with the class based component or use the new function compoent style if you know how to do it. If you decide to use the class component just copy the App.js content from here:
- src/App.js +26 -11
|
@@ -1,24 +1,39 @@
|
|
|
1
1
|
import React, { Component } from 'react';
|
|
2
|
+
import ToggleButton from 'react-toggle-button';
|
|
2
3
|
import logo from './logo.svg';
|
|
3
4
|
import './App.css';
|
|
4
5
|
|
|
5
6
|
class App extends Component {
|
|
7
|
+
constructor(props) {
|
|
8
|
+
super(props);
|
|
9
|
+
this.state = { ledOn: false };
|
|
10
|
+
}
|
|
11
|
+
|
|
12
|
+
setLedState(state){
|
|
13
|
+
this.setState({ ledOn: state !== '0' })
|
|
14
|
+
}
|
|
15
|
+
|
|
16
|
+
componentDidMount() {
|
|
17
|
+
fetch('/led')
|
|
18
|
+
.then(response => response.text())
|
|
19
|
+
.then(state => this.setLedState(state));
|
|
20
|
+
}
|
|
21
|
+
|
|
22
|
+
handleStateChange(ledOn) {
|
|
23
|
+
fetch('/led', { method: 'PUT', body: ledOn ? '0' : '1' })
|
|
24
|
+
.then(response => response.text())
|
|
25
|
+
.then(state => this.setLedState(state));
|
|
26
|
+
}
|
|
27
|
+
|
|
6
28
|
render() {
|
|
7
29
|
return (
|
|
8
30
|
<div className="App">
|
|
9
31
|
<header className="App-header">
|
|
10
32
|
<img src={logo} className="App-logo" alt="logo" />
|
|
11
|
-
<p>
|
|
12
|
-
Edit <code>src/App.js</code>and save to reload.
|
|
13
|
-
</p>
|
|
14
|
-
<a
|
|
15
|
-
className="App-link"
|
|
16
|
-
href="https://reactjs.org"
|
|
17
|
-
target="_blank"
|
|
18
|
-
rel="noopener noreferrer"
|
|
19
|
-
>
|
|
20
|
-
Learn React
|
|
21
|
-
</a>
|
|
33
|
+
<ToggleButton
|
|
34
|
+
value={this.state.ledOn}
|
|
35
|
+
onToggle={value => this.handleStateChange(value)}
|
|
36
|
+
/>
|
|
22
37
|
</header>
|
|
23
38
|
</div>
|
|
24
39
|
);
|
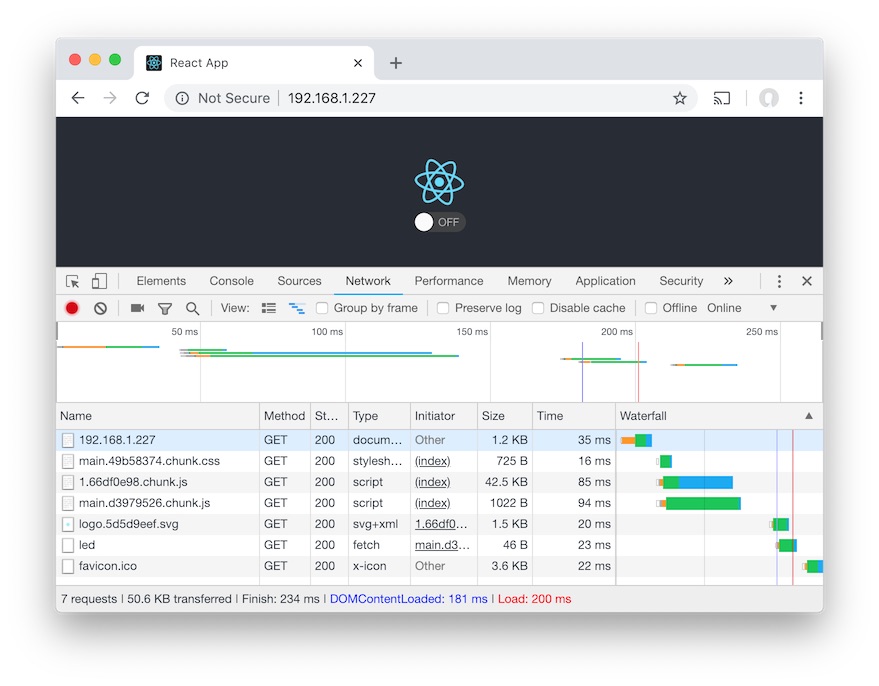
Now toggling the button should also blink the led on the microcontroller.

5. Building the Project
We are almost ready to upload the app to the microcontroller, but first we need to build a minified version of it. To do this run:
npm run buildThe command created us a new directory called build. This directory now contains the minified javascript and css files as well as other static files like images.
The next step is to serve these files with the microcontroller. Unless you have set the Use external editor setting in the Arduino IDE you will need to close the Arduino project at this point.
To convert the files in the build directory to a Arduino compatible format we need first add some configurations to the package.json.
- package.json +12 -2
|
@@ -12,7 +12,8 @@
|
|
|
12
12
|
"start": "react-scripts start",
|
|
13
13
|
"build": "react-scripts build",
|
|
14
14
|
"test": "react-scripts test",
|
|
15
|
-
"eject": "react-scripts eject"
|
|
15
|
+
"eject": "react-scripts eject",
|
|
16
|
+
"dist": "awot-static"
|
|
16
17
|
},
|
|
17
18
|
"eslintConfig": {
|
|
18
19
|
"extends": "react-app"
|
|
@@ -26,5 +27,14 @@
|
|
|
26
27
|
"devDependencies": {
|
|
27
28
|
"awot-scripts": "0.0.22"
|
|
28
29
|
},
|
|
29
|
-
"proxy": "http://arduino.ip"
|
|
30
|
+
"proxy": "http://arduino.ip",
|
|
31
|
+
"awot-static": {
|
|
32
|
+
"sources": "./build",
|
|
33
|
+
"indexFile": "index.html",
|
|
34
|
+
"sketchDir": "./BlinkServer",
|
|
35
|
+
"exclude": [
|
|
36
|
+
"*.map",
|
|
37
|
+
"service-worker.js"
|
|
38
|
+
]
|
|
39
|
+
}
|
|
30
40
|
}
|
Next run:
npm run distThis command took the contents of build directory and embedded the data to the StaticFiles.h under the BlinkServer directory. To save some space the files were at the same time compressed with gzip. The script also generated the proper http headers for encoding, cache control, response length and content type. In real life you would most likely want to exclude this file from your version control system.
- BlinkServer/StaticFiles.h +4487 -14
|
@@ -1,21 +1,4494 @@
|
|
|
410
|
+
void static_index (Request &req, Response &res) {
|
|
411
|
+
P(static_index_0) = {
|
|
412
|
+
0x1f, 0x8b, 0x08, 0x00, 0x00, 0x00, 0x00, 0x00, 0x00, 0x13, 0x8d, 0x55,
|
|
...
|
|
|
499
|
+
0x00
|
|
500
|
+
};
|
|
501
|
+
|
|
502
|
+
res.set("Content-Encoding", "gzip");
|
|
503
|
+
res.set("Cache-Control", "no-cache");
|
|
504
|
+
res.set("Content-Length", "1045");
|
|
505
|
+
res.set("Last-Modified", "Wed, 16 Jan 2019 20:18:30 GMT");
|
|
506
|
+
res.set("Vary", "Accept-Encoding");
|
|
507
|
+
|
|
508
|
+
res.success("text/html; charset=utf-8");
|
|
509
|
+
res.writeP(static_index_0, 1045);
|
|
510
|
+
}
|
You can now upload your sketch. Point your browser to the device IP that is displayed when it boots up. With any luck, in a few hundred milliseconds you should see the same page as before, but now completely hosted on the microcontroller.
That's it!.